HP Deskjet plus 4100 - 'Another program has control of the scanner' Message Displays
HP Deskjet plus 4100 - 'Another program has control of the scanner' Message Displays

This document is for HP All-in-One printers.
When you try to scan, 'Another program has control of the
scanner' or 'Another program has control of the HP
device' displays on the computer and the scan fails.
Windows
Step 1: Download and run the HP Print and Scan Doctor
Use the HP Print and Scan Doctor to fix the issue.
Download and run HP Print and Scan Doctor  to automatically diagnose and resolve printer hardware and
connection issues.
to automatically diagnose and resolve printer hardware and
connection issues.
to automatically diagnose and resolve printer hardware and
connection issues.
If the issue persists, continue to the next step.
Step 2: Stop the scanning processes, and then restart the printer and the computer
Use Windows Task Manager to stop the scanning processes, and then
restart the HP product and computer.
-
Open the Task Manager.
-
Windows 8Right-click the taskbar near the Start button (
 ), and then click Task Manager.
-
Windows Vista or Windows 7:Right-click the taskbar near the Windows icon (
 ), and then click Start Task Manager.
-
Windows XP:Right-click the taskbar near the Start button, and then click Task Manager.
-
-
Click the Processes tab.
-
Select Keygrip.exe from the list of processes, and then click End Process.
-
Select scanapp.exe from the list of processes, and then click End Process.
-
Press the Power button to turn the printer off, and then press the Power button again to turn the printer on.
-
Restart the computer.
-
Try to scan again.
If the issue persists, continue to the next step.
Step 3: Uninstall the HP software
Uninstall the HP software from your computer.
-
Windows 8
-
Right-click the bottom left corner of the screen, and then click Programs and Features. The Programs and Features window opens with a list of installed programs.
NOTE:
If you do not see any HP software in the list, there is no software to remove from your computer. -
In the list of programs, click [your printer name] Basic Device Software, click Uninstall, and then click Yes. Follow the on-screen instructions to uninstall the software.
-
Repeat the preceding step to remove other HP printer software titles.
-
Restart the computer before starting to reinstall the driver.
-
-
Windows Vista or Windows 7
-
On the Windows taskbar, click the Windows icon (), and then click Programs. A list of programs
installed on your computer displays.
-
Click the HP folder, and then click the folder with the name and model number of your HP printer.
-
Click Uninstall, and then follow the on-screen instructions. The software uninstalls.
-
Restart the computer before starting to reinstall the driver.
-
-
Windows XP
-
On the Windows taskbar, click Start (
 ), and then click All Programs. A list of
programs installed on your computer displays.
), and then click All Programs. A list of
programs installed on your computer displays.
-
Click the HP folder, and then click the folder with the name and model number of your HP printer.
-
Click Uninstall, and then follow the on-screen instructions. The software uninstalls.
-
When the uninstall process completes, restart the computer, and then continue to the next step.
-
Step 4: Reinstall the software
Download and install the printer software from the HP website.
-
Turn on the printer.
-
Disconnect the USB cable from the printer, if necessary. The software installation prompts you to connect the cable if needed.
-
Go to HP Customer Support - Software and Driver Downloads.
-
If a Let's identify your product to get started page displays, click Printer, type your printer model number, and then click Submit.
-
If you need to change the operating system, click Change, select your version, and then click Change.
-
Under the Driver heading, click Download for the full software package, or click Basic Drivers for other driver options.
Continue to the next step.
Step 5: Update the printer's firmware
Update the printer firmware for printers connected to a computer with
Windows.
-
Make sure the printer is on and connected to the computer through your local network or USB cable.
-
Go to HP Customer Support - Software and Driver Downloads.
-
If a Let's identify your product to get started page displays, click Printer.
-
Type your printer model number, and then click Submit.The software results page for your printer displays with the default operating system selected.
-
If you need to change the version of Windows, click Change, select your version, and then click Change.
-
Click Firmware, and then click Download.If a Firmware section is not listed, an update is not currently available for your printer.
-
Save the file to your computer.
-
Locate and then open the file to start the installation process.
-
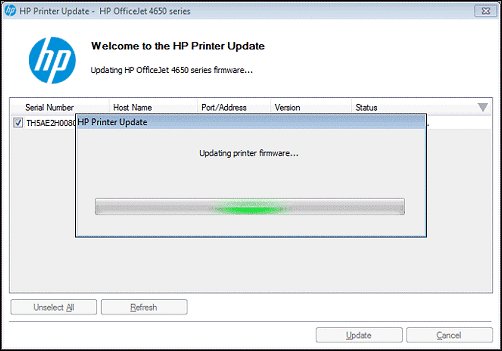
When the HP Printer Update window opens, see if the printer serial number displays.
-
If the serial number displays, select the checkbox next to it, and then click Update.
-
If the serial number displays but the status is 'not applicable' (grayed out), you do not need the firmware update. Click Cancel.
-
If the serial number does not display and your printer uses a network connection, connect a USB cable to the printer and computer. Wait 20 seconds, and then click Refresh. When the serial number displays, select the checkbox next to it, and then click Update.
-
-
When the update completes, click OK.
-
If you connected a USB cable to update your network printer, remove the USB driver installed by Windows.
-
Search Windows for control panel, and then click Control Panel in the results.
-
Click View Devices and printers.
-
Right-click the USB printer device that matches your printer model, and then select Remove Device.
-
Disconnect the USB cable from the printer and the computer, and then restart the computer.
-
If the issue persists, contact HP.
Mac OS
Check the following items before proceeding.
-
The printer is turned on and in a ready state.
-
The HP Scan software is closed and not running on the computer.
-
If the printer is shared on a network, and if other users currently have the HP Scan software running and have scan jobs in the queue, wait for them to close the software and complete the jobs.
Step 1: Repair the disk permissions
-
In the Applications folder, open the Utilities folder.
-
Double-click Disk Utility.
-
Select Macintosh HD on the left side of the window.
-
Click the First Aid tab, if it is not already selected.
-
Click Repair Disk Permissions.
-
Try to scan.
If the issue persists, continue to the next step.
Step 2: Uninstall the HP software
Uninstall the HP software from the computer.
-
Remove the printer from the computer's printers list.
-
Go to Applications > Hewlett-Packard.
-
Double-click the HP Uninstaller, and then click Continue.
-
Select the printer to uninstall, and then click Uninstall.
-
When prompted, type the Administrator name and Password, and then click OK.
-
When the Uninstaller finishes, drag any icons for the printer to the Trash.
-
Empty the Trash, and then close all open windows.
-
Restart the computer, and then continue to the next step.
Step 3: Reinstall the software
Download and install the printer software from the HP website.
-
Turn on the printer.
-
Disconnect the USB cable from the printer, if necessary. The software installation prompts you to connect the cable if needed.
-
Go to HP Customer Support - Software and Driver Downloads.
-
If a Let's identify your product to get started page displays, click Printer, type your printer model number, and then click Submit.
-
If you need to change the operating system, click Change, select your version, and then click Change.
-
Under the Driver heading, click Download for the full software package, or click Basic Drivers for other driver options.
Continue to the next step.
Step 4: Update the printer's firmware
Update the printer firmware for printers connected to a Mac.
-
Make sure the printer is on and connected to the computer through your local network or USB cable.
-
Go to HP Customer Support - Software and Driver Downloads.
-
If a Let's identify your product to get started page displays, click Printer.
-
Type your printer model number, and then click Submit.The software results page for your printer displays with the default operating system selected.
-
If you need to change the version of macOS or OS X, click Change, select your version, and then click Change.
-
Click Firmware, and then click Download.If a Firmware section is not listed, an update is not currently available for your printer.
-
When the download is complete, open the [Printer_name].dmg file.
-
Double-click HP Firmware Updater.
-
Click the name of your printer, and then click Continue.

-
The updater checks the firmware version installed on the printer, and then displays the results in the Update Information window.
-
If Device is ready to be reflashed displays, click Continue to update the firmware.When the update completes, click Done.
-
If This Firmware Updater does not contain upgrades for your device displays, the printer firmware is already updated to the most recent version. Click Cancel to exit the updater.
-
If the issue persists, contact HP.
https://support.hp.com/


Comments
Post a Comment