HP Deskjet plus 4100 - 'Error 2081883401' Displays During Software Install or Uninstall (Windows)
HP Deskjet plus 4100 - 'Error 2081883401' Displays During Software Install or Uninstall (Windows)
When installing or uninstalling the printer software, an Install
Failed message or an Installation Error - 2081883401: Failed to
Uninstall Device with Serial Number message displays, and the install
or uninstall fails.
Read one of the following sections that matches your operating system
version for steps to resolve the issue.
Windows 10
When uninstalling the HP software using the Uninstall or change program
tool, an Error-2081883401: Failed to uninstall device with serial
number message displays. This error can display after you upgrade
your computer from Windows 8.1 to Windows 10.
Figure : Example of an 'Error-2081883401' message
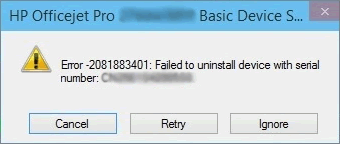
To uninstall the software, click Ignore in the error window. The
uninstall process begins. If prompted to restart your computer,
click Yes to complete the software uninstall.
Windows 8
Follow these steps to remove, and then reinstall the printer software.
Step one: Remove the existing software
-
Disconnect the USB cable from both your printer and the computer, if connected.
-
On your computer, click Cancel or OK to close the installation error dialog box, if it is still open.
-
Right-click the Start button (
 ) and then click Programs and Features. The Programs
and Features window opens with a list of installed
programs.
) and then click Programs and Features. The Programs
and Features window opens with a list of installed
programs.
-
In the list of programs, click your printer's basic device software, click Uninstall, and then click Yes.
-
An error message might display when the printer software attempts to uninstall. Click Cancel on the error message to stop the uninstall.
-
In the list of installed programs, right-click your printer's basic device software, and then click Repair.
-
When the repair is complete, click Uninstall again.
-
If an error displays a second time, click Retry.
-
If your computer uninstalls the software, continue to the next step to restart your computer.
-
If an error displays a second time, click Retry.
-
If an error displays a third time, click Ignore.
-
-
When the uninstall completes, restart your computer.
Step two: Download and install the software from the HP website
-
Turn on the printer.
-
Disconnect the USB cable from the printer, if necessary. The software installation prompts you to connect the cable if needed.
-
Go to HP Customer Support - Software and Driver Downloads.
-
If a Let's identify your product to get started page displays, click Printer, type your printer model number, and then click Submit.
-
If you need to change the operating system, click Change, select your version, and then click Change.
-
Under the Driver heading, click Download for the full software package, or click Basic Drivers for other driver options.
Windows 7
Follow these steps to remove, and then reinstall the printer software.
Step one: Remove the existing software
-
Disconnect the USB cable from both your printer and the computer, if connected.
-
On your computer, click Cancel or OK to close the installation error dialog box, if it is still open.
-
On the Windows taskbar, click the Windows icon (
 ), and then click Control Panel.
-
In the Control Panel window, click Programs and Features. A list of currently installed programs displays.
-
In the list of programs, click your printer's basic device software, and then click Uninstall.
-
If an error displays, click Cancel to stop the uninstall.
-
In the list of installed programs, click your printer's basic device software, and then click Repair.
-
When the repair is complete, click Uninstall again.
-
If your computer uninstalls the software, continue to the next step to restart your computer.
-
If an error displays a second time, click Retry.
-
If an error displays a third time, click Ignore.
-
-
When the uninstall completes, restart your computer.
Step two: Download and install the software from the HP website
-
Turn on the printer.
-
Disconnect the USB cable from the printer, if necessary. The software installation prompts you to connect the cable if needed.
-
Go to HP Customer Support - Software and Driver Downloads.
-
If a Let's identify your product to get started page displays, click Printer, type your printer model number, and then click Submit.
-
If you need to change the operating system, click Change, select your version, and then click Change.
-
Under the Driver heading, click Download for the full software package, or click Basic Drivers for other driver options.
-
If these steps resolved the issue, there is no need to continue troubleshooting.
-
If the issue persists, see the next step.
Step three: Remove the software using the Microsoft Fix it utility
-
Go to the Microsoft website.
-
In the search box, type program install and uninstall, and then press Enter.
-
Click Microsoft Program Install and Uninstall utility.
-
Click the Run now button to download.
-
Click Accept.
-
Select Detect problems and let me select the fixes to apply.
-
Select Uninstalling. A list of currently installed programs displays.
-
Select all the components associated with your printer, and then click Next to complete the uninstall.
-
When the uninstall completes, restart your computer.
Step four: Download and install the software from the HP website
-
Turn on the printer.
-
Disconnect the USB cable from the printer, if necessary. The software installation prompts you to connect the cable if needed.
-
Go to HP Customer Support - Software and Driver Downloads.
-
If a Let's identify your product to get started page displays, click Printer, type your printer model number, and then click Submit.
-
If you need to change the operating system, click Change, select your version, and then click Change.
-
Under the Driver heading, click Download for the full software package, or click Basic Drivers for other driver options.
Windows Vista
Follow these steps to remove, and then reinstall the printer software.
Step one: Remove the existing software
-
Disconnect the USB cable from both your printer and the computer, if connected.
-
On your computer, click Cancel or OK to close the installation error dialog box, if it is still open.
-
On the Windows taskbar, click the Windows icon (), and then click Control Panel.
-
In the Control Panel window, click Programs and Features. A list of currently installed programs displays.
-
In the list of programs, click your printer's basic device software, and then click Uninstall.
-
If an error displays, click Cancel to stop the uninstall.
-
In the list of installed programs, click your printer's basic device software, and then click Repair.
-
When the repair is complete, click Uninstall again.
-
If your computer uninstalls the software, continue to the next step to restart your computer.
-
If an error displays a second time, click Retry.
-
If an error displays a third time, click Ignore.
-
-
When the uninstall completes, restart your computer.
Step two: Download and install the software from the HP website
-
Turn on the printer.
-
Disconnect the USB cable from the printer, if necessary. The software installation prompts you to connect the cable if needed.
-
Go to HP Customer Support - Software and Driver Downloads.
-
If a Let's identify your product to get started page displays, click Printer, type your printer model number, and then click Submit.
-
If you need to change the operating system, click Change, select your version, and then click Change.
-
Under the Driver heading, click Download for the full software package, or click Basic Drivers for other driver options.
-
If these steps resolved the issue, there is no need to continue troubleshooting.
-
If the issue persists, see the next step.
Step three: Remove the software using the Microsoft Fix it utility
-
Go to the Microsoft website.
-
In the search box, type program install and uninstall, and then press Enter.
-
Click Microsoft Program Install and Uninstall utility.
-
Click the Run now button to download.
-
Click Accept.
-
Select Detect problems and let me select the fixes to apply.
-
Select Uninstalling. A list of currently installed programs displays.
-
Select all the components associated with your printer, and then click Next to complete the uninstall.
-
When the uninstall completes, restart your computer.
Step four: Download and install the software from the HP website
-
Turn on the printer.
-
Disconnect the USB cable from the printer, if necessary. The software installation prompts you to connect the cable if needed.
-
Go to HP Customer Support - Software and Driver Downloads.
-
If a Let's identify your product to get started page displays, click Printer, type your printer model number, and then click Submit.
-
If you need to change the operating system, click Change, select your version, and then click Change.
-
Under the Driver heading, click Download for the full software package, or click Basic Drivers for other driver options.
Windows XP
Follow these steps to remove, and then reinstall the printer software.
NOTE:If you have multiple HP printers installed on your computer, some of the software components might be shared. Use caution if the uninstaller asks if you want to remove shared files. Other HP printers or software programs might not work correctly if you delete certain files.
Step one: Remove the existing software
-
Disconnect the USB cable from both your printer and the computer, if connected.
-
On your computer, click Cancel or OK to close the installation error dialog box, if it is still open.
-
On the Windows taskbar, click Start (
 ), and then click Control Panel.
-
In the Control Panel window, click Add or Remove Programs. A list of currently installed programs displays.
-
In the list of installed programs, click your printer's basic device software, and then click Remove.
-
If an error displays, click Cancel to stop the uninstall.
-
In the list of installed programs, click the Change button next to your printer's basic device software to repair the existing software.
-
When the repair is complete, click Remove again.
-
If your computer uninstalls the software, continue to the next step to restart your computer.
-
If an error displays a second time, click Retry.
-
If an error displays a third time, click Ignore.
-
-
When the uninstall completes, restart your computer.
Step two: Download and install the software from the HP website
-
Turn on the printer.
-
Disconnect the USB cable from the printer, if necessary. The software installation prompts you to connect the cable if needed.
-
Go to HP Customer Support - Software and Driver Downloads.
-
If a Let's identify your product to get started page displays, click Printer, type your printer model number, and then click Submit.
-
If you need to change the operating system, click Change, select your version, and then click Change.
-
Under the Driver heading, click Download for the full software package, or click Basic Drivers for other driver options.
-
If these steps resolved the issue, there is no need to continue troubleshooting.
-
If the issue persists, see the next step.
Step three: Remove the software using the Microsoft Fix it utility
-
Go to the Microsoft website.
-
In the search box, type program install and uninstall, and then press Enter.
-
Click Microsoft Program Install and Uninstall utility.
-
Click the Run now button to download.
-
Click Accept.
-
Select Detect problems and let me select the fixes to apply.
-
Select Uninstalling. A list of currently installed programs displays.
-
Select all the components associated with your printer, and then click Next to complete the uninstall.
-
When the uninstall completes, restart your computer.
Step four: Download and install the software from the HP website
-
Turn on the printer.
-
Disconnect the USB cable from the printer, if necessary. The software installation prompts you to connect the cable if needed.
-
Go to HP Customer Support - Software and Driver Downloads.
-
If a Let's identify your product to get started page displays, click Printer, type your printer model number, and then click Submit.
-
If you need to change the operating system, click Change, select your version, and then click Change.
-
Under the Driver heading, click Download for the full software package, or click Basic Drivers for other driver options.
HP Printers - 'HP Installer Uninstaller Stopped Working' Error Displays (Windows 10)
This document is for HP printers and Windows 10 computers.
When uninstalling the HP printer driver and software in Windows 10,
an HP Installer Uninstaller has stopped working error displays.
Figure : HP Installer Uninstaller error
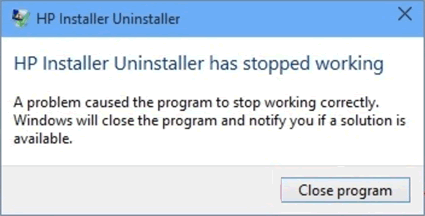
To resolve the issue, click Close program, click Finish in
the You must restart your computer to finish the uninstall window, and then restart the computer to complete the software
removal.
https://support.hp.com/


Comments
Post a Comment